
The Issue summary screen displays one line for each numbered issue for the selected type of holding. The issues listed in the grid are accessible to all shelfmarks on the title. The Copies received and Copies barcoded columns reflect the status of each issue at the selected shelfmark.
Brief bibliographic data displays above the grid. This data is protected and includes the fields defined in the !Serial element/group profile record.
Below the bibliographic data is a grid containing one row for each issue defined for the selected type of holding.
Numbering – enumeration and chronology of the issue.
Copies received – number of copies of this issue received for the selected shelfmark. If the type of holding is attached to subscriptions, you may not receive issues. The copies received column is updated either by Serials check-in or by creating an item barcode. You may enter this screen and find that copies received is greater than copies barcoded. This is because received issues need not necessarily be barcoded.
Copies barcoded – number of copies of this issue barcoded for the selected shelfmark.
[I] – use this option if the issue you are receiving is not already listed. This button is disabled if the current type of holding is attached to subscriptions. If enabled, the system displays the Add/modify issue form. Please refer to section 311.3.2.3.
[*] – select one of the issues and then use this option to receive and barcode that issue for the selected shelfmark. If the issue is already received, the system will just attach a barcode. Use this option to barcode serial issues that were received within the Serials module or to receive and barcode multivolumes. Please see below under Barcoding issues.
[R*] – select one of the issues and then use this option to receive (but not barcode) that issue for the selected shelfmark. If the type of holding is attached to subscriptions, you may not receive issues. Please refer to section . Please see below under Barcoding issues .
[N*] – select one of the issues and then use this option to change the numbering for the selected issue. . Please refer section 311.3.2.3.
[M] – use this option to change the order of display issues in the grid. Please refer to section 311.3.5.
Select one of the issues from the Issue summary screen and choose the icon. The system displays the Enter a new item form.
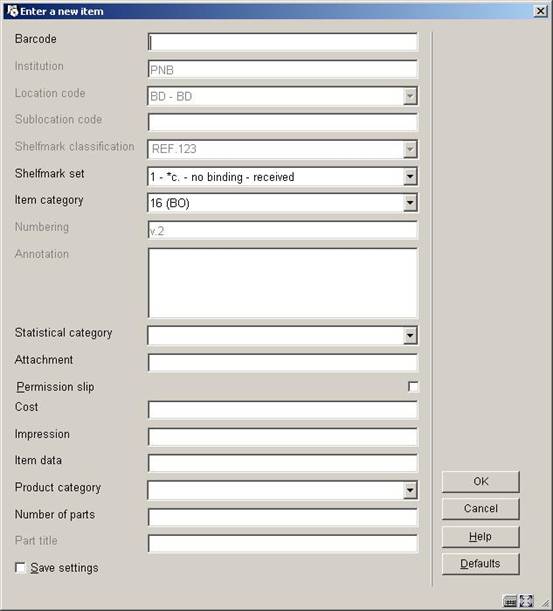
Shelfmark set – this field contains a dropdown list of shelfmark sets (for the current shelfmark) that you can attach this barcode to. For each shelfmark set in the list, the system displays a number (starting at 1 for unique identification purposes) followed by copy number (from the Shelfmark set general form), binding status (i.e. no binding versus binding copy) and receipt status (i.e. not received versus received). The system also includes one entry that is blank. Use this entry to start a new shelfmark set.
For example,

Select 1 if you are barcoding an issue already received in Serials.
Select 2 to receive and barcode the issue that belongs to the binding copy shelfmark set.
Select 3 to receive and barcode the issue for a completely new shelfmark set for the current shelfmark.
After entering the barcode, select the correct shelfmark set, item category, etc and press to create the barcode. If the issue was not previously received, it will now display as both received and barcoded. The system returns to the Issue summary screen.
Select one of the issues from the Issue summary screen and choose the icon to receive (but not barcode) the issue. The system displays the Receive issue form.
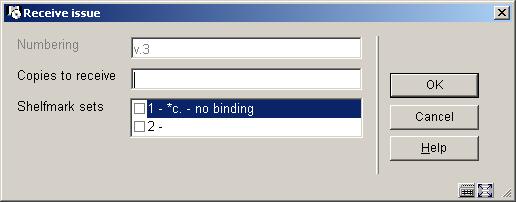
Numbering – enumeration and chronology of the issue. Not updateable.
Copies to receive – enter the number of copies of the issue that you are receiving for the current shelfmark.
Shelfmark sets – select which shelfmark sets you want to receive for. The list contains the shelfmark sets for the current shelfmark that have not received this specific issue (i.e. v.3). If a shelfmark set is controlled by a subscription,
it does not get included in the list. A blank entry is also included in the list to allow you to receive the issue for a completely new shelfmark set.
For each shelfmark set in the list, the system displays a number (starting at 1 for unique identification purposes) followed by copy number (from the Shelfmark set general form) and binding status (i.e. no binding versus binding copy).
When you press the system verifies that the value in Copies to receive matches the number of shelfmark sets you selected. If no discrepancy is found, the system marks the issue as received on the selected shelfmark sets.
Once you have finished adding all information the system returns to the List of shelfmarks screen.
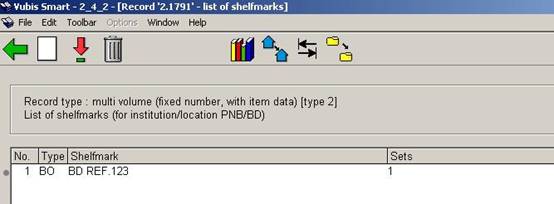
Type: the materials types of the items belonging to this shelfmark.
Shelfmark: the complete shelfmark of the items belonging to this shelfmark.
Sets: the number of sets linked to this shelfmark.
[I] - Select this option to add a new shelfmark. Please refer to section 111.6.1.1.
[*] - Select a shelfmark and then choose this option to update holdings information for this shelfmark. See section 111.6.1.2.
[S*] - Select a shelfmark and then choose this option to delete the shelfmark. This can only be done if there are no sets linked to the shelfmark.
[A*] - Select a shelfmark and then select this option to change the material type. Select the desired answer from the list.
Note
This changes the material type of ALL items linked to this shelfmark.
: to display items of another institution/location (the system can be configured in such a way that only the items of the current institution/location are shown initially).
: this option is only available in certain circumstances.
[W] - If you select this option, an input screen appears. In the input field From shelfmark enter the number of the line containing the shelfmark whose holdings data you wish to move. In the following input field To shelfmark, enter the number of the line containing the shelfmark to which you wish to move the holdings information.
Note
You will be moving ALL linked sets of that shelfmark to the new shelfmark. The shelfmark from which you moved the sets (to which now no sets are linked) is automatically deleted.
Select the icon from the Full record screen. The system displays the Item summary screen. Select one of the items and the system displays the Item detail entry screen. Select the Location field and the system responds by displaying the Location form.
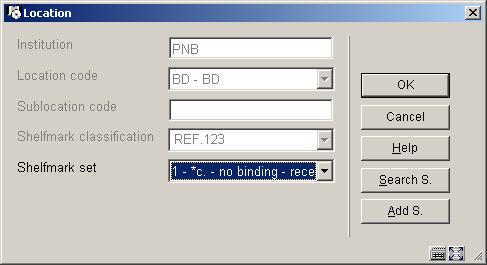
Shelfmark set – displays a dropdown list of shelfmark sets at the current shelfmark that you can move this item to. If the item was received through Serials control, you will only see one shelfmark set in the list. For each shelfmark set in the list, the system displays a number (starting at 1 for unique identification purposes) followed by copy number (from the Shelfmark set general form), binding status (i.e. no binding versus binding copy) and receipt status (i.e. not received versus received). The system may also include one entry that is blank. Use this entry to start a new shelfmark set.
If you wish to move the item to another shelfmark on this title use either the (search shelfmark) or (add shelfmark) button depending on whether the shelfmark you are moving to already exists on the title. Regardless of which option you choose, the system redisplays the Location form with the newly selected shelfmark.
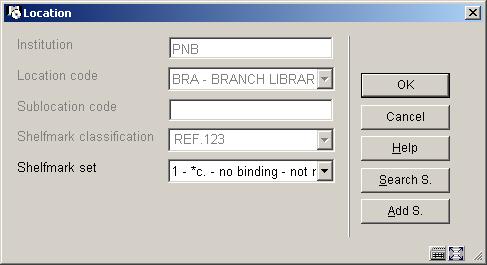
Now press to move the item to the new shelfmark.
The system behaves in the same way as with publication type 4.
When you choose type 3 it is not possible to use the option to add items. In that case the following message will be displayed:
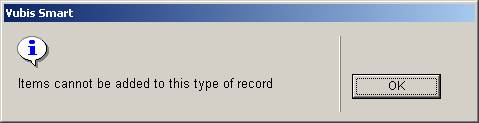
You can however add a shelfmark in the usual way (see section 111.5.2). Next the system will not show the usual add item screen, but the holdings statement form. See section 111.6.1.1 for more information.
The system behaves in the same way as with publication type 3.
·
Document control - Change History
|
Version |
Date |
Change description |
Author |
|
1.0 |
unknown |
creation |
|
|
2.0 |
July 2006 |
major rewrite of holdings maintenance for release 2.4.2 serials modifications |
|
|
3.0 |
March 2007 |
Added info on cataloguing permissions; authority searching |
|
|
4.0 |
November 2007 |
added info on use of Z39.50 when copying records to local database delivered as part of 2.4.2.4 updates |
|